Modelling in SheetCam
For modelling we used SheetCam, but you can also use any other CAM software.
1. Prepare your file
1.1. Select “New Part” in the file menu.
1.2. Press “Yes” when it asks you if you want to import a fil.
1.3. Select your DXF file and press open.
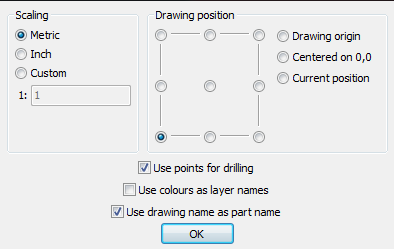
1.4. In the drawing menu set the “Scaling” to metric and the “Drawing Position” to bottom left and press OK.
1.5. Select “Edit contours” icon (C) on top of the screen.

1.6. Right click the circle on your drawing and select “Move to layer”.
1.7. Select “New layer” and name it “circle”.
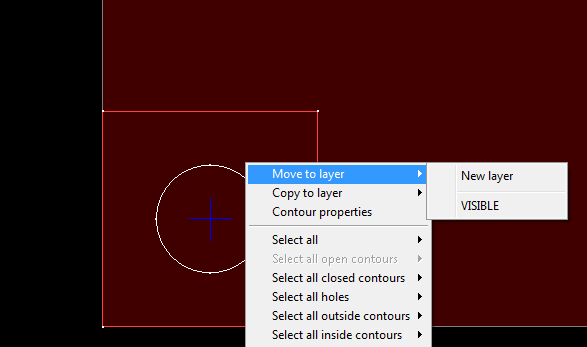
1.8. Right click the square on your drawing and select “Move to layer”.
1.9. Select “New layer” and name it.
2. Define the tool
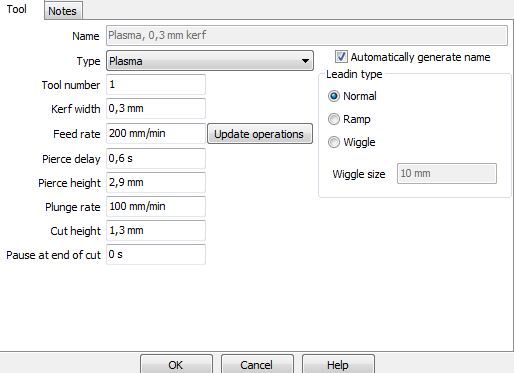
2.1. Select “Create a new jet cutting tool” in the “Tool” section on the left side of the screen.
2.2. Enter the settings as shown on the picture.
3. Define the cutting operations
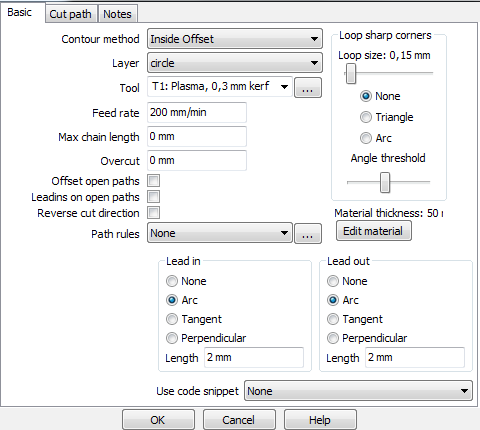
3.1. For the circle:
- Select “Create a new jet cutting operation” in the “Operations” section on the left side of the screen.
- Set “Contour method” to “Inside Offset”.
- Set “Layer” to “circle”.
- Select the tool you defined earlier.
- Set “Feed rate” to 200 mm/min.
- Set “lead in” and “lead out” to “Arc”.
3.1. For the square:
- Select “Create a new jet cutting operation” in the “Operations” section on the left side of the screen.
- Set “Contour method” to “Outside Offset”.
- Set “Layer” to “square”.
- Select the tool you made earlier.
- Set “Feed rate” to 200 mm/min.
- Set “lead in” and “lead out” to “Arc”.
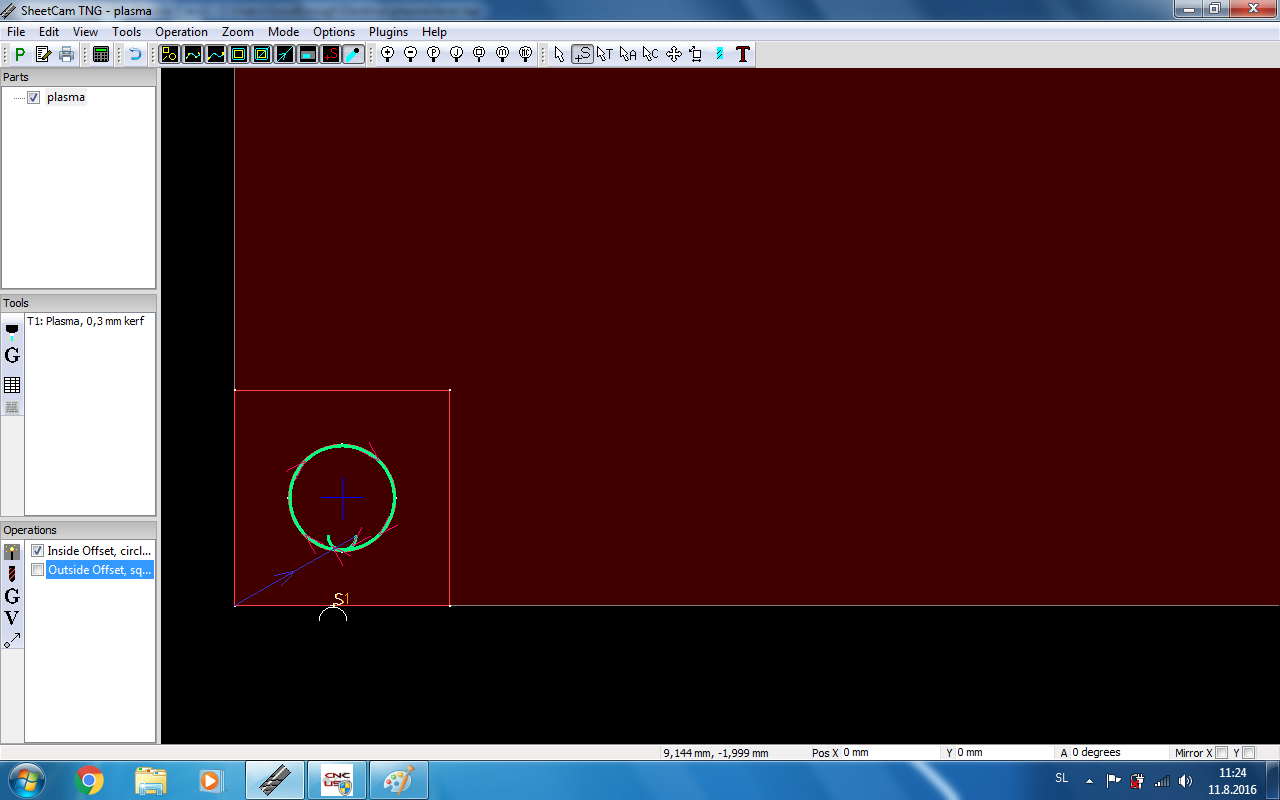
5. Set the starting point
5.1. Deselect the second operation in the “operations” section an select “Edit start points” icon (S) on top of the screen.

5.2. Select the edge of the square on the drawing to set the start point on the edge of the square and reselect the second operation.
6. Post processor
6.1. If needed you can change your post processor settings By selecting “Machine” in the “Options” on top of the screen in the second tab (Post Processor).
6.2. Press the “Run post processor” icon (P) on top of the screen.

6.3. Select a folder and press Save
Updated almost 9 years ago
