Designing in Onshape
We designed our box using free online 3D CAD system Onshape, but you can also use any other CAD software.
1. Create a new document
1.1. Click “create” to create a new document.
1.2. Name the document and select the “Private” option.
1.3 Change the working units to millimetres in the Document menu.
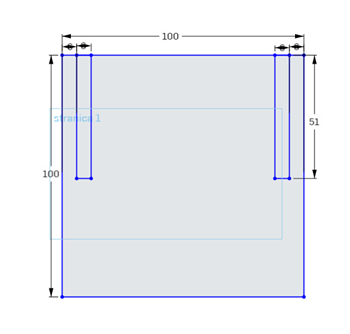
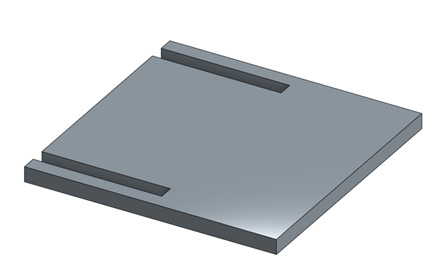
2. Create side surface 1
2.1. Create a new Sketch an select the top plane.
2.2. Draw a 100 x 100 square.
2.3. Draw 2 additional 6 x 51 squares that touch the top line of the big square and are 6 mm away from the left and right side.
2.4. Press the check mark to end the sketch.
2.5. Make a 6 mm deep extrude and select the sketch surface without the 2 smaller squares.
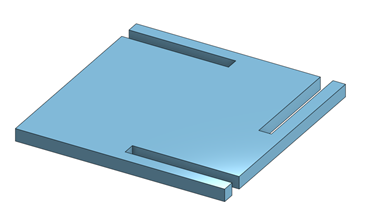
3. Create side surface 2
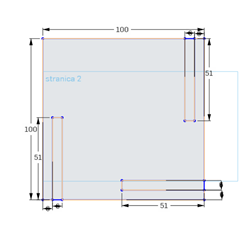
3.1. Create a new Sketch an select the top plane.
3.2. Draw a 100 x 100 square.
3.3. Draw 3 additional 6 x 51 squares:
- The first one touches the top line and is 6 mm away from the right line of the big square.
- The second one touches the top line and is 6 mm away from the left line of the big square.
- The third one touches the right line and is 6 mm away from the bottom line of the big square.
3.4. Press the check mark to end the sketch.
3.5. Make a 6 mm deep extrude and select the sketch surface without the 3 smaller squares.
4. Create bottom surface
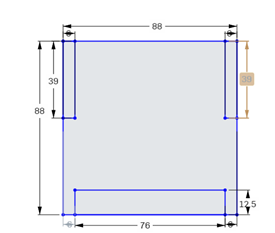
4.1. Create a new Sketch an select the top plane.
4.2. Draw a 88 x 88 square.
4.3. Draw 2 6 x 39 squares in the left and right top corner of the big square.
4.4. Draw a 76 x 12.5 square that touches the bottom line and is 6 mm away from the left and right line of the big square.
4.5. Press the check mark to end the sketch.
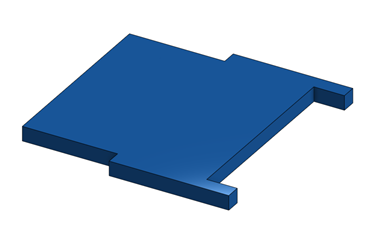
4.6. Make a 6 mm deep extrude and select the sketch surface without the 3 smaller squares.
5. Export
5.1. Right click each part and select export.
5.2. Choose the IGES format and download the file.
5.3. Find the file on your Computer and rename it for easier finding later on.
Updated less than a minute ago
